Cleaning EBSD data
Tutorial for cleaning EBSD data
Why we need to clean EBSD data? [Chris]
- Producing nice figures
- Beta reconstruction
- Reproduction of features (twins, precipitate phases, misindexed orientations, etc.)
Important examples of cleaned data
Cast Mg alloy - soft orientated grains deformed heavily during preparation and do not index
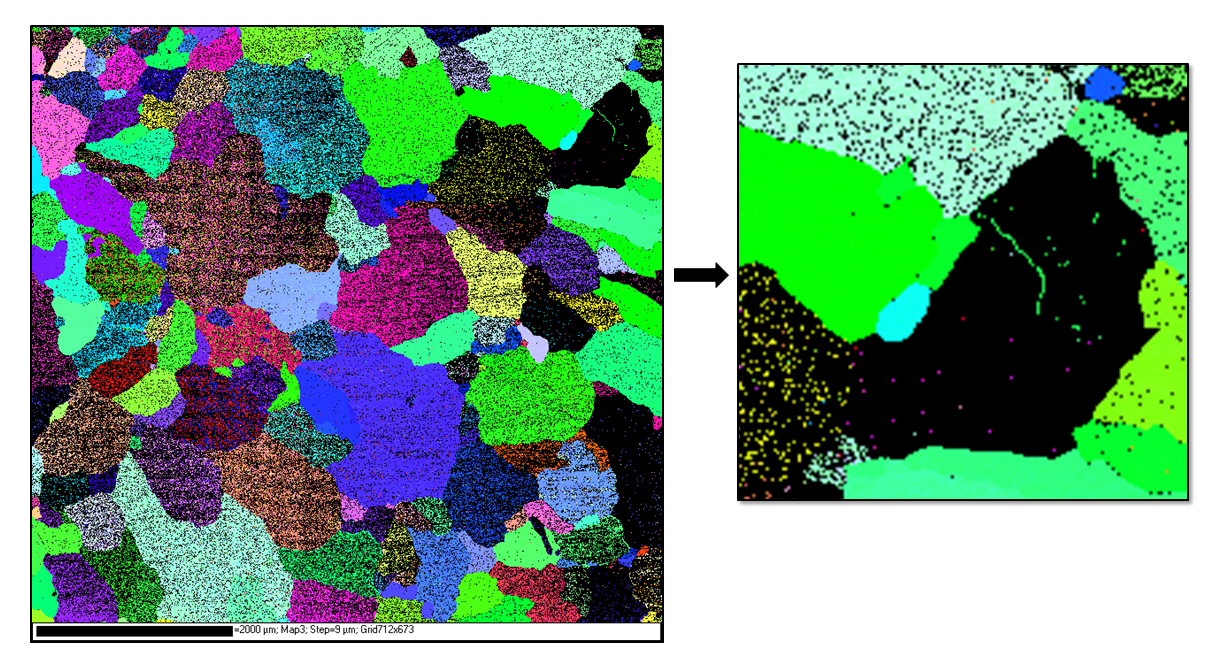
To fix: (see magnified image) can use consistent orientation indexed points to assumed true orientation of the misindexed grains. Using software such as CHANNEL5, copy and paste the trusted orientation around the grain edge, then ‘grow out’ the orientations to fill in the unindexed grains.
Alternatively, re-prepare the sample with less/no deformation using less physically aggressive polishing methods such vibration polishing or electropolishing.
Cold rolled Mg alloy - deformation twins too small to index during EBSD due to overlapping EBSD patterns
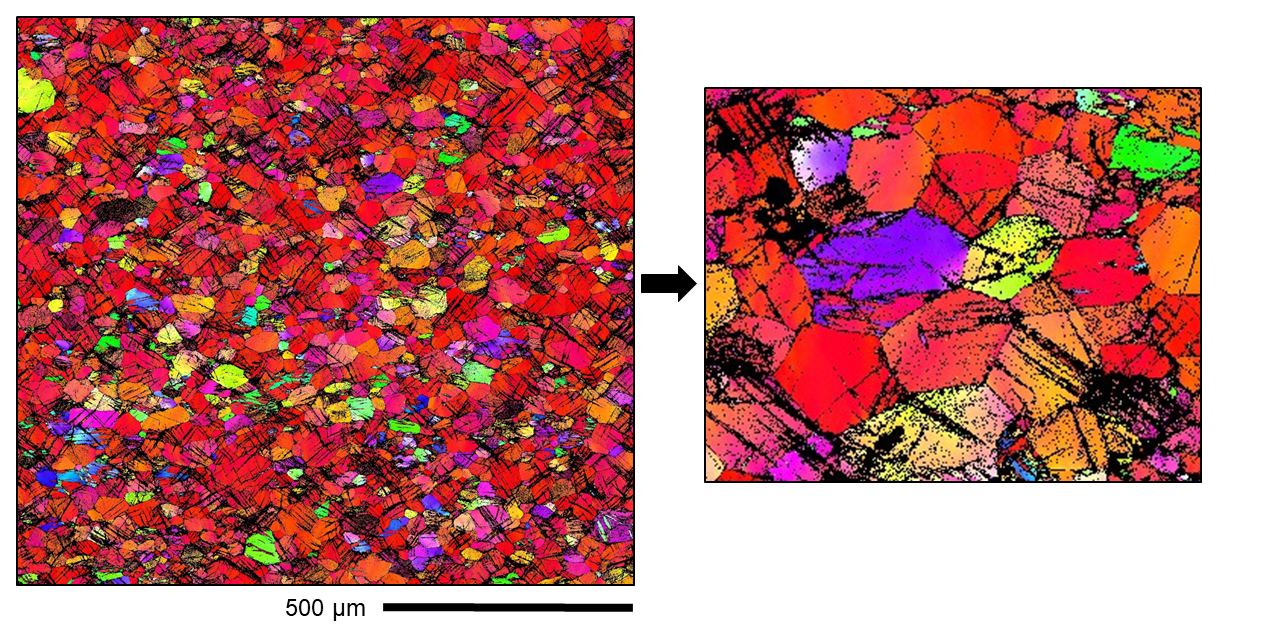
Unfortunately, there is no easy way to fix this. A lower current/smaller electron beam spot size may be able to index these twins, but the scan would run to slow for this to be feasible. Instead, transmission kikuchi diffraction (TKD) can be used since it has a much higher resolution than EBSD. (Even higher resolution mapping can be obtain using scanning preccesion electron diffraction in the TEM).
Ti-6Al-4V % commercially pure titanium additively manufactured alloy-alloy composite
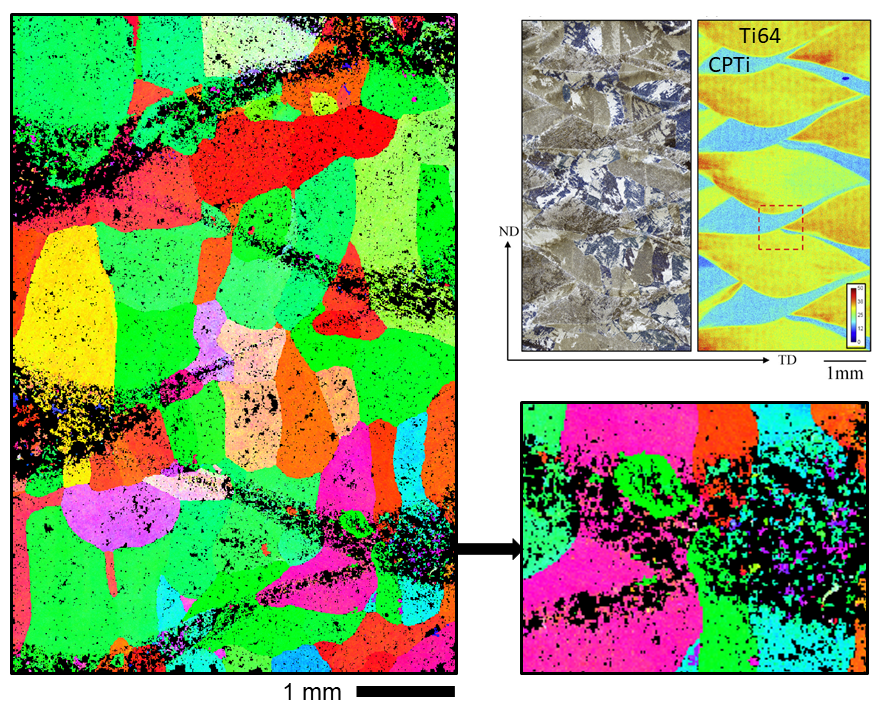
The soft CP Ti does not scan well due to deformation introduced during polishing, but the (relatively hard) Ti64 scans well, producing the regions of unindexed/misindexed points. This map of the Ti alpha phase was then reconstructed to the beta phase using the UoS beta reconstruction software. The unindexed and misindexed alpha data points are translated through the beta reconstruction and re-produced the regions of CP Ti in the final EBSD map (shown above on the left). In the magnified insert, the misindexed points can be seen. This cannot simply be ‘grown out’ to clean the map and must be removed manually using software like CHANNEL5 - the true beta grains can be seen clearly either side of the misindexed regions, so the grains boundaries can be outlined using copy and paste of trusted orientations, then they can be grown out to produce a good estimate of the true beta microstructure. For more information, please see:
https://doi.org/10.1016/j.msea.2019.138289 Davis et al. Mat. Sci. Eng. A 765 (2019), 1 - 16.
Different cleaning algorithms [Nick]
- Removing wild spikes
- Nearest neighbour
- Kuwahara
Cleaning data using Aztec Channel 5 for beta reconstruction
Open up Aztec Channel 5 Project Manager - this manages the Tango (Map), Mambo (pole figure) and Salsa (ODF) packages. Load the Channel 5 .cpr project file, which allows Channel 5 to read the binary .crc data files, by clicking on the Project and then Open… tabs.
Click on statistics at the bottom of the window, select the Titanium Cubic phase, and click the Remove Phase from Project tab. This will remove all of the beta phase from the data. Note, do not save this project as the original .cpr file as this will permanently delete any indexed beta phase.
Drag the project to the Tango icon to open up the map. At this point it could be useful to plot an IPF map to view the orientations, by clicking on the Create new map icon.
Click on the Perform noise reduction icon to clean the map. Clicking on Wild spikes: Extrapolate will remove any single indexed points that are not surrounded by similar orientations. Depending on the resolution of the data, it may either be neccessary to remove all wild spikes, but it could also detrimentally affect the beta reconstruction. Our group tend to avoid removing wild spikes.
Use the standard nearest neighbour extrapolation to grow the alpha grains. Start with low level (8 nearest neighbour) extrapolation and make sure the iterate box is ticked. This will perform noise reduction and show the remaining fraction of non-indexed points. Allow a refinement to finish, then reduce the level to 7 nearest neightbours, then to 6, etc. until the remaining non-indexed points are exactly 0%. In cases where the map has a border, because the sample was smaller than the scan area, then you may need to reclick on extrapolate at 1 nearest neightbour to grow out the edges. Then click apply to apply this refinement to the data, this will change the map.
To save the data, click on Project, Export, as Channel Text File (*.ctf).
Note, if the data is too big to load into the beta reconstruction software or if there is a small region of the map you are interested in, you can use the subset selection tool, select a rectangle, and crop the area.
Cleaning data using Aztec Crystal for beta reconstruction
Open AZtec Crystal and load your EBSD map.
Select ‘Clean up’ tab:

On the right side you will find the ‘settings’ tab for clean up:
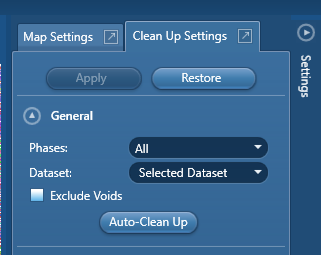
Select the phases and dataset you wish to clean up. The ‘Exclude Voids’ tab will identify features such as sample edges and cracks and avoid those during clean up. How Crystal identifies these features is not trivial – please see the help file for more information. Finally, ‘Auto-Clean Up’ is self-explanatory – it is not recommended. Click this button at your own peril. Below this section is the ‘Wild Spike Removal’ tab:

The help file is particularly useful regarding this feature:

The next step is ‘Zero Solution Removal’:
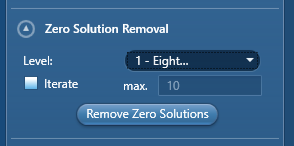
The ‘level of cleaning’ is scaled from 1 – the least aggressive – to 8 – the most aggressive. Level 1 requires 8 indexed pixels surrounding a non-indexed point to ‘fill’ it in, while level 8 requires only 1 neighbouring pixel to fill in an un-indexed point. Selecting the ‘Iterate’ function just repeats the zero solution removal until there are no points left to fill that fulfil your selected level criteria, unless you input a desired number of iterations into the ‘max’ field.
A good place to start with this function, is to run level 1 until no more points can be filled, then run level 2, then level 3 and so on. However, care must be taken not to skew EBSD maps and data to the point where they are unrepresentative of your material.
Each step in the cleaning you select in Crystal will be conveniently listed at the bottom of the cleaning tab; e.g.
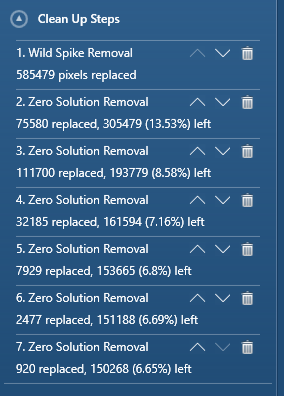
The amount of non-indexed points remaining after each step is listed in parenthesis, making it easy to delete unnecessary steps. Unfortunately, at time of writing, Crystal cannot store a particular cleaning ‘routine’ for use on other maps.
Once a cleaning routine has been selected, it can be applied at the top of the tab using the ‘Apply’ button:

Note that there is also a ‘Restore’ option, allowing you to return your original data if you are unhappy with the cleaning results.
