EBSD Sample preparation
Metallurgical preparation of Ti6Al4V specimens for EBSD examination (B12 lab)
First the specimen needs to be mounted in the resin, in hot compression mounting machine. If you are preparing the sample for EBSD examination, remember that If your sample is not flat on both sides, it will be very difficult to obtain EBSD map on this sample, regardless of the faultlessness of the preparation.
Turn Struers TetraPol grinder on and water on the main tap. For grinding we use the SiC abrasive papers starting from 180, 320, 600, 800, 1200, 2400 and ending at 4000 grade, under flowing water with sliding speed between 200 to 300 rpm. Regarding details of the grinding technique, people often have different methods for the force and time that they grind for, these vary from couple of seconds to 10 mins on every paper with manual force adjusted to the size and state of the material of the specimen (for example CP Ti is softer and more prone to scratches in comparison with Ti alloys, also Ti64 specimen in deformed state will be more difficult to prepare than the one that has been cast or annealed at β phase temperature). The rule of thumb is that after grinding on each paper you should not see any scratches from the previous paper (by eye). You should use User Defined mode (you can control the speed and the water supply).
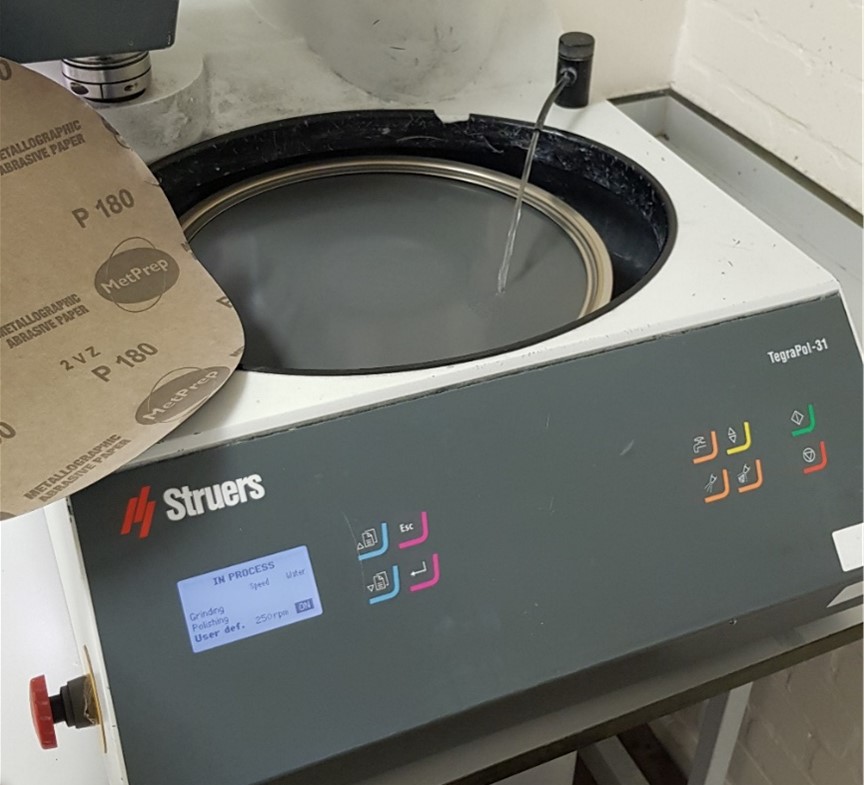
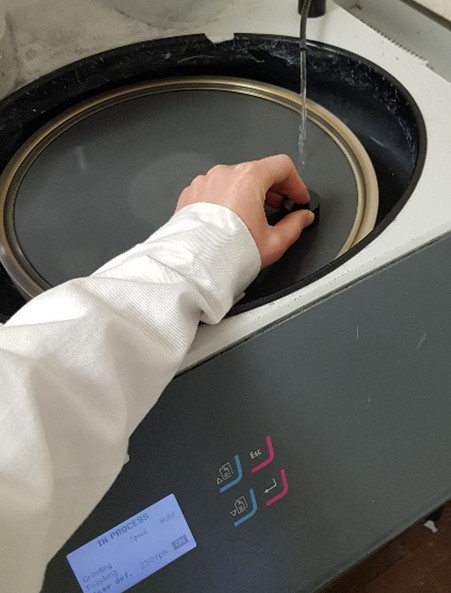
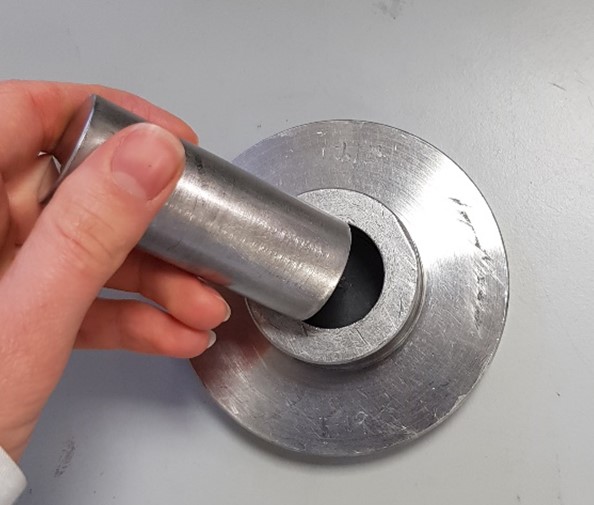
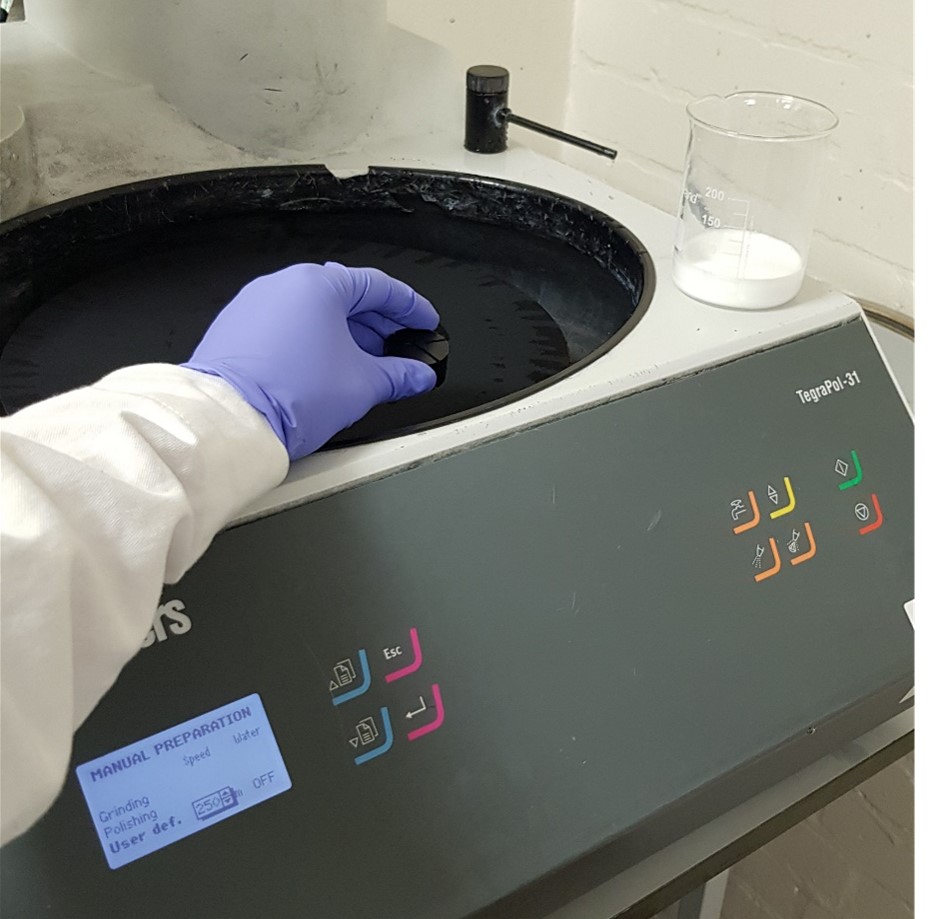
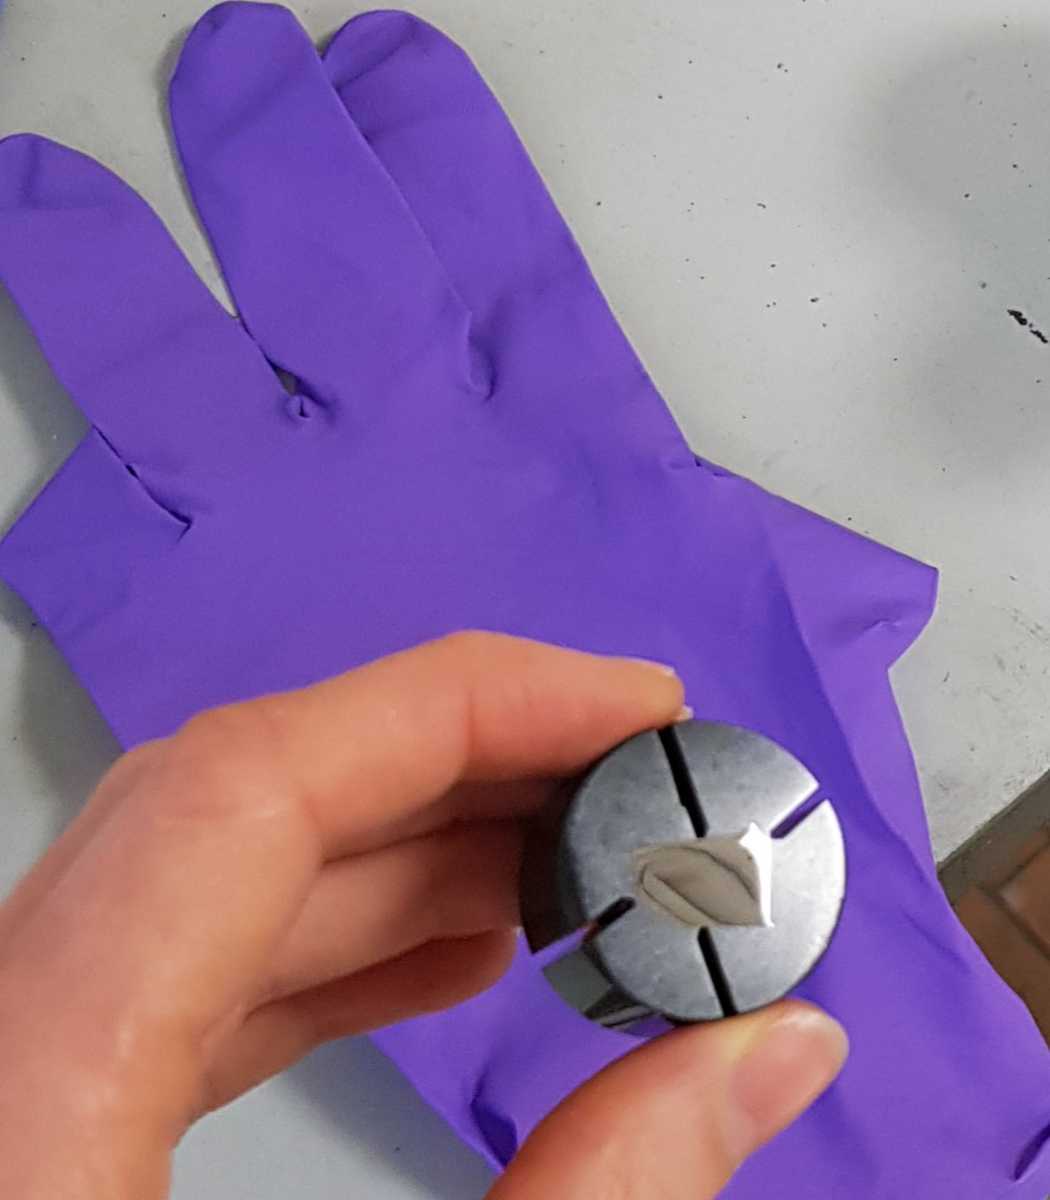
When the machine is set, press the green button (by pressing the red one, you can always stop the grinder). Place the specimen on the disc, but not in the centre. Hold your specimen in the way that your hands are aligned with the net force on the disc but counteract it (left image). You can also use the designed tool to keep the sample on the rotating disc (right image).
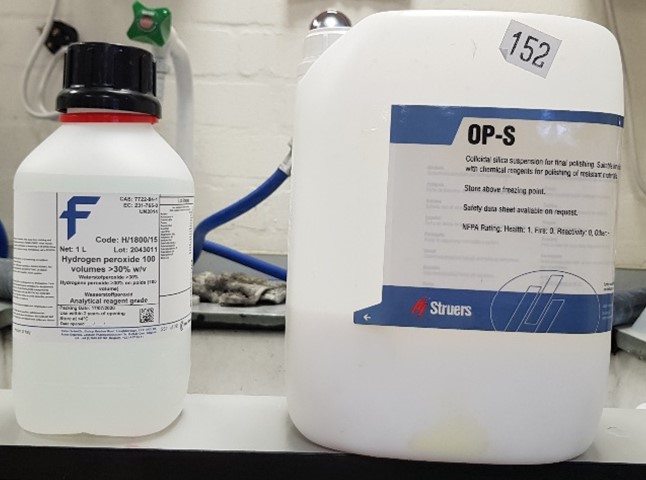
After grinding, chemical-mechanical polishing with a mixture of colloidal silica (OP-S) and hydrogen peroxide should be performed on a polishing cloth with proportions: 4 OP-S to 1 hydrogen peroxide. Put on the gloves. Mix the liquids in a small container, install the polishing cloth on the magnetic disc, turn the water off, adjust the speed and press the green button. Pour some of the mixture onto the cloth and place your sample on the rotating disk in the same way as for grinding. Adjust the force and the time of polishing to the state of material of your sample (cast, deformed, hot annealed etc) and the size of it. As in case of grinding, people often have different methods for force and time that they apply for polishing too, these vary from 2 -5 mins on OPS with a “hard force” or 20 mins of “light” pressure. When you are done, apply ethanol and dry up your sample. If you see any kind of residual smear from the OP-S mixture you can try to remove it by turning the water on and as remaining OP-S mixture is still on the cloth, slightly press the sample on the rotating disk.
Titanium and titanium alloys should normally look very clean after polishing so you should not see any dirt or anything like that on the surface. Due to the hexagonal crystal lattice of the α phase, the microstructural details in titanium can be seen using cross-polarized light on a light optical microscope, without etching. This can be used as rapid and easy assessment of the polish quality. Remember that highly deformed material are in general more difficult to prepare and exhibit poorer response to cross-polarized light (lack of sharp detail and poor contrast).
Once you are satisfied with the surface quality of your sample, you need to break the resin with the use of handsaw (make 4 cuts around your sample), glove and vice. Be careful to not scratch the surface of your sample. Adhere the sample to the SEM holder using the smallest amount of super glue. Clean with the stream of ethanol and dry thoroughly using the dryer on the wall –> this is important as it helps maintain the vacuum chambers of our SEMs in a good condition.Coat your sample and sample holder with a silver paint to minimise charging during EBSD examination (give it enough time to dry before continuing with EBSD).
Light Alloy Sample Preparation for Optical and Electron Microscopy
Disclaimer: these preparation guides are a recommended starting point for your preparation routines – successful parameters will vary depending on your alloy composition and thermomechanical processing.
1. Mg
Sample mounting: for EBSD, avoid resin if possible – mechanical (e.g. sawing) removal can cause scratching and distortion of sample. For cold-mount resin, if sample precipitation/heat treatment is not important, sample can be removed from resin by heating to ~150°C when resin becomes soft. Brass/aluminium holders recommended. Conductive resin can be successful, but depends on what voltage/beam/EBSD scanning parameters you use.
1.1. Grinding and Polishing
1.1.1. Grinding with SiC Paper and Water
-180/320 grit to shape sample
-Can then jump straight to 4000 grit (make sure all remaining scratches are fine)
-Clean with ethanol and dry with an air dryer immediately.
1.1.2. Polishing with Diamond Suspension & Fumed Silica Particles
-NO WATER
-Use dedicated 3μm diamond paste pad – top up with 3μm diamond suspension spray when necessary. Use a few drops of oil-based lubricant for each sample. Usually 2 minutes is enough time.
-Clean with ethanol in ultrasonic bath. Dry immediately with air dryer.
-Use dedicated 1μm diamond paste pad – top up with 1μm diamond suspension spray when necessary. Use a few drops of oil-based lubricant for each sample. Usually 2 minutes is enough time.
-Clean with ethanol in ultrasonic bath. Dry immediately with air dryer.
-Use dedicated final polishing step pad – clean twice by dousing pad with ethanol and running a Mg/Al rounded scraper from centre to edge while pad is spinning, cleaning the scraper with tissue paper between each scrape. Pour a small amount of fumed silica polishing solution (~0.25 μm) onto the pad where you intend to polish your sample – there should not be any excess. 4 minutes should be enough polishing time. Repeat this step for every sample.
-Clean with fresh ethanol mixing in ethylene glycol with a ~10:1 ratio in ultrasonic bath. Give sample a final clean with ethanol and dry immediately with air dryer.
Note: the fumed silica can be difficult to remove. This doesn’t need to be removed if followed by etching/broad ion beam polishing. If this isn’t the case, dedicate the outer rim of the polishing pad to this cleaning by not applying the fumed silica in this region, then douse constantly with ethanol and gently polish the sample surface for a few seconds.
1.2. EBSD Preparation Steps
Polishing Mg often creates a thin deformed top layer on the sample and can significantly reduce the intensity/contrast of EBSD patterns, leading to low indexing. This needs to be removed.
1.2.1. Manual Electropolishing (electrochemical material removal)
-Place electrolyte in centre beaker and stir with magnetic stirrer.
-If reduced temperature operation required, pour liquid nitrogen in the outer beaker.
-Positive current wire from DC power source attaches to tweezers and negative current to a conductive plate placed in the centre beaker.
-For material removal, use tweezers to submerge sample in electrolyte.
-To ensure the sample surface is electropolished as much as possible, reduce depth of sample (electropolishing focuses on the sample sides if not) and submerge as little of the tweezers as possible in the electrolyte.
-After removal from electrolyte, transfer to ethanol as quickly as possible. Once clean, dry immediately with air dryer.
-Electrolyte composition and temperature, and electropolishing time are alloy/heat treatment dependent. A good place to start is a 30% nitric acid concentration in methanol (methanol cools much quicker than ethanol) at -40°C (must be kept below -20°C at all times once mixed for safety), electropolishing at 9V for 3s at a time and checking the sample surface. Note: add the nitric acid to methanol at -40°C a little at a time, as the reaction is exothermic and the solution heats up quickly.
-Once electropolished, you will not be able to see visibly if the sample will scan by EBSD, so you will have to experiment and test. Note: sometimes a slightly corroded sample surface will still give good EBSD patterns. The trick is to balance material removal and corrosion rate – if the sample is too corroded, use lower temperature or less acid concentration to slow the corrosion rate.
1.2.2. Broad Ion Beam (BIB) Preparation Steps
-Ensure your sample will fit in the BIB holder before you start preparation.
-Again, the preparation parameters are material dependent, but a good place to start is: 1) 7kV, 12.5° beam angle, 15 minutes polishing; 2) 7kV, 5° beam angle, 15 minutes polishing.
1.3. TEM 3mm Disc Grinding and Electropolishing
-Grind material to a foil ~80-150μm thick (thinner is usually better).
-Twin-jet polish using an electrolyte of 10% nitric acid and methanol solution, at -40°C with a voltage of 16V. Place sample under vacuum as soon as possible.
-Corrosion product is common and sometimes unavoidable after twin-jet polishing, so follow with a precision ion beam polishing system (PIPS) using a decreasing voltage of 1 – 0.1kV and angle of 5-1° (depending on starting disc thickness). This can take up to 24 hours to get sufficient clean electron transparent material. Place sample under vacuum as soon as possible.
-PIPS can also be used to thin the disc from the start without the use of electropolishing (using 3kV or higher), but this is time consuming and not recommended.
2. Al
Sample mounting: for EBSD, avoid resin if possible – mechanical (e.g. sawing) removal can cause scratching and distortion of sample. For cold-mount resin, if sample precipitation/heat treatment is not important, sample can be removed from resin by heating to ~150°C when resin becomes soft. Brass/aluminium holders recommended. Conductive resin can be successful, but depends on what voltage/beam/EBSD scanning parameters you use.
2.1. Grinding and Polishing
2.1.1. Grinding with SiC Paper and Water
-180/320 grit to shape sample
-Can then jump straight to 4000 grit (make sure all remaining scratches are fine)
-Clean with ethanol/methanol and dry with an air dryer immediately.
2.1.2. Polishing with Diamond Suspension & OPS
-NO WATER for corrosion sensitive alloys (e.g. high Zn 7xxx series alloys)
-Use dedicated 3μm diamond paste pad – top up with 3μm diamond suspension spray when necessary. Use a few drops of water/oil-based lubricant for each sample. Usually 2 minutes is enough time.
-Clean with ethanol in ultrasonic bath. Dry immediately with air dryer.
-Use dedicated 1μm diamond paste pad – top up with 1μm diamond suspension spray when necessary. Use a few drops of water/oil-based lubricant for each sample. Usually 2 minutes is enough time.
-Clean with ethanol in ultrasonic bath. Dry immediately with air dryer.
-Use dedicated final polishing step pad – clean twice by dousing pad with ethanol/methanol and running a Mg/Al rounded scraper from centre to edge while pad is spinning, cleaning the scraper with tissue paper between each scrape. Pour a small amount of neat OPS (~0.25μm) onto the pad where you intend to polish your sample – there should not be any excess. 1-2 minutes should be enough polishing time. If polishing a corrosion sensitive sample, reduce polishing time as much as possible since even neat OPS contains water. Repeat this step for every sample. Note: fine scratches can be removed with the BIB.
-Clean with fresh ethanol in ultrasonic bath. Give sample a final clean with ethanol and dry immediately with air dryer.
2.2. EBSD Preparation Steps
Polishing Al often creates a thin deformed top layer on the sample and can significantly reduce the intensity/contrast of EBSD patterns, leading to low indexing. This needs to be removed.
2.2.1. Manual Electropolishing
– see Mg (§1.2.1.) for setup.
-Electrolyte composition and temperature, and electropolishing time are alloy/heat treatment dependent. A good place to start is a 30% nitric acid concentration in methanol (methanol cools much quicker than ethanol) at -40°C (must be kept below -20°C at all times once mixed for safety), electropolishing at 9V for 3s at a time and checking the sample surface. Note: add the nitric acid to methanol at -40°C a little at a time, as the reaction is exothermic and the solution heats up quickly.
-Once electropolished, you will not be able to see visibly if the sample will scan by EBSD, so you will have to experiment and test. Note: sometimes a slightly corroded sample surface will still give good EBSD patterns. The trick is to balance material removal and corrosion rate – if the sample is too corroded, use lower temperature or less acid concentration to slow the corrosion rate.
2.2.2. BIB Preparation Steps
-Ensure your sample will fit in the BIB holder before you start preparation.
-Again, the preparation parameters are material dependent, but a good place to start is: 1) 7kV, 12.5° beam angle, 15 minutes polishing; 2) 7kV, 5° beam angle, 15 minutes polishing.
2.3. TEM 3mm Disc Grinding and Electropolishing
-Grind material to a foil ~80-150μm thick (thinner is usually better).
-Twin-jet polish using an electrolyte of 30% nitric acid and methanol solution, at -40°C with a voltage of 12V. The trick is to balance material removal and corrosion rate – if the sample is too corroded, use lower temperature or less acid concentration to slow the corrosion rate. Place sample under vacuum as soon as possible.
-PIPS can also be used to thin the disc from the start without the use of electropolishing (using 3kV or higher), but this is time consuming and not recommended.
3. Ti
Sample mounting: for EBSD, avoid resin when putting in the SEM, but samples can be prepared in it as breaking them out rarely damages the sample surface. Do not use cold-mount resin – it is too soft and causes rounded sample surfaces. Conductive resin can be successful, but depends on what voltage/beam/EBSD scanning parameters you use.
3.1. Grinding and Polishing
3.1.1. Grinding with SiC Paper and Water
-180/320 grit to shape sample
-Grind at 600, 1200, and 4000 grit for about 30s each, making sure all remaining scratches are approximately the same width.
-Clean with ethanol/methanol and air dry immediately.
3.1.2. Polishing with OPS
3.1.2.1. Harder alloys (~350HV or higher, including (100%) basketweave microstructure Ti-6Al-4V and other α+β alloys, and aged β-stabilised alloys)
-Use dedicated final polishing step pad – clean twice by dousing pad with water and running a Mg/Al rounded scraper from centre to edge while pad is spinning, cleaning the scraper with tissue paper between each scrape. Clean again in this manner with ethanol/methanol. Pour a small amount of a water:OPS:hydrogen peroxide, 4:1:1 solution onto the pad where you intend to polish your sample – there should not be any excess. Push hard on your sample for 1-2 minutes, then push lightly for ~30s.
-OPS is tough to remove completely from Ti. Run sample under hot water then, with a clean gloved finger, gently rub standard dish washing soap (e.g. Fairy Liquid) onto the surface. Run under the hot tap again while continuing to rub the surface gently, then clean with ethanol/methanol and air dry.
3.1.2.2. Softer alloys (~350HV or lower, including coarse, single-variant colony and bimodal microstructure Ti-6Al-4V and other α+β alloys, α alloys, and CPTi)
-Use dedicated final polishing step pad – clean twice by dousing pad with water and running a Mg/Al rounded scraper from centre to edge while pad is spinning, cleaning the scraper with tissue paper between each scrape. Clean again in this manner with ethanol/methanol. Pour a small amount of a water:OPS:hydrogen peroxide, 4:1:1 solution onto the pad where you intend to polish your sample – there should not be any excess. Push softly on your sample for 15 minutes.
-OPS is tough to remove completely from Ti. Run sample under hot water then, with a clean gloved finger, gently rub standard dish washing soap (e.g. Fairy Liquid) onto the surface. Run under the hot tap again while continuing to rub the surface gently, then clean with ethanol/methanol and air dry.
3.1.3. Alternative Polishing Methods
-
For EBSD of bi-modal Ti64 the grinding process is as described above, however the polishing process used to achieve good indexing in this instance is quite different to that previously described. Instead of a water: OPS: hydrogen peroxide, 4:1:1 solution softly polished for 15 minutes, I have found that better indexing is achieved for the Ti64 fan blade sampples investigated when using a solution of 4:1 hydrogen peroxide: OPS for at least 25 minutes. The polishing step is immediately followed by a 5-minute period of polishing under running water in order, to prevent OPS from sticking to the surface. After polishing under water the same cleaning process as previously described in 3.1.2.2 was also conducted.
-
For EBSD of fully lamellar Ti64 a polishing solution of hydrogen peroxide and OPS in a 1:1 ratio is used initially used for 5 minutes, the sample surface is then cleaned as previously described in section 3.1.2.2, before polishing is continued using a polishing solution of hydrogen peroxide: OPS: water in a 1:1:4 ratio until there are no visiblie scratches or defects in darkfield imaging on optical microscopes.
3.2. EBSD Preparation Steps
For soft Ti alloys, polishing often creates a thin deformed top layer on the sample and can significantly reduce the intensity/contrast of EBSD patterns, leading to low indexing. This needs to be removed.
3.2.1. Manual Electropolishing
– see Mg (§1.2.1.) for setup.
-Electrolyte composition and temperature, and electropolishing time are alloy/heat treatment dependent. A good place to start is a 5% perchloric acid concentration in methanol at -40°C, electropolishing at 12V for 3s at a time and checking the sample surface. Note: add the perchloric acid to methanol at
-40°C a little at a time, as the reaction is exothermic and the solution heats up quickly.
-Once electropolished, you will not be able to see visibly if the sample will scan by EBSD, so you will have to experiment and test. Note: sometimes a slightly corroded sample surface will still give good EBSD patterns. The trick is to balance material removal and corrosion rate – if the sample is too corroded, use lower temperature or less acid concentration to slow the corrosion rate.
3.2.2. BIB Preparation Steps
-Ensure your sample will fit in the BIB holder before you start preparation.
-Again, the preparation parameters are material dependent, but a good place to start is: 1) 7kV, 12.5° beam angle, 30 minutes polishing; 2) 7kV, 5° beam angle, 30 minutes polishing.
3.2.3. TEM 3mm Disc Grinding and Electropolishing
-Grind material to a foil ~80-150μm thick (thinner is usually better).
-Twin-jet polish using an electrolyte of 5% perchloric acid and methanol solution, at -40°C with a voltage of 17V. The trick is to balance material removal and corrosion rate – if the sample is too corroded, use lower temperature or less acid concentration to slow the corrosion rate. Place sample under vacuum as soon as possible.
